1. Introducing Copilot
Copilot is an intelligent virtual assistant developed by Microsoft that can help you find information, entertain, study and work more effectively. You can open Copilot in a variety of ways, such as pressing the taskbar button, using the Windows + C keyboard shortcut, or creating a separate shortcut.
2. How to add Copilot to the right-click menu on Windows 11
Step 1: Click Start > Search for regedit and click the top result to open Registry Editor.
Step 2: Browse to the following link:
HKEY_CLASSES_ROOT\DesktopBackground\Shell
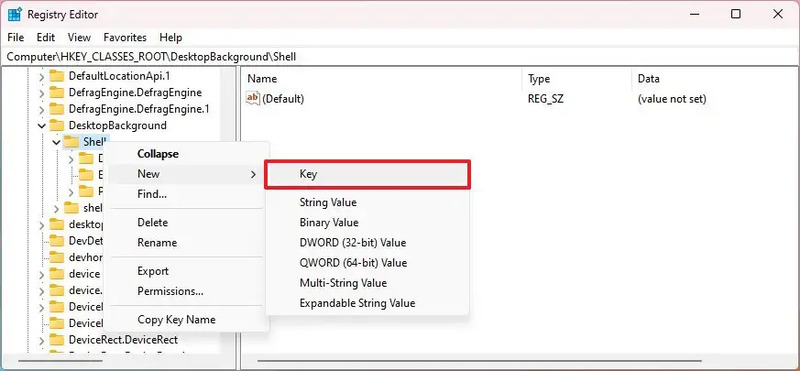
Step 3: Right-click Shell key > Select New > Key
Step 4: Name it Copilot > Press Enter.
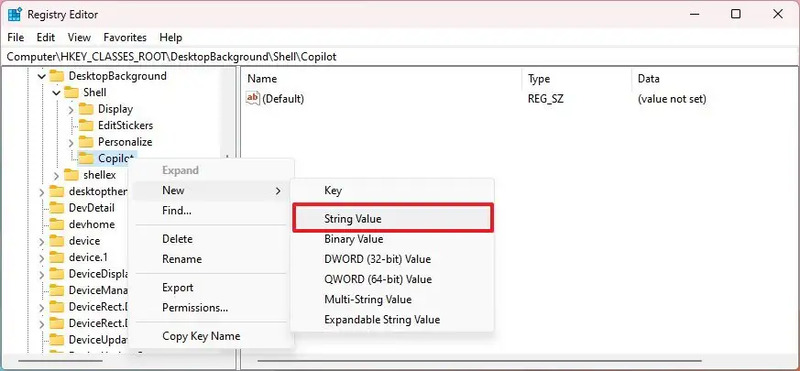
Step 5: Right-click on the newly created key > Select New > String Value
Step 6: Name it MUIVerb and then Enter
Step 7: Double-click the newly created String and set its value to Copilot > OK
Step 8: Right-click the Copilot key > New > Key
Step 9: Name it command > Enter
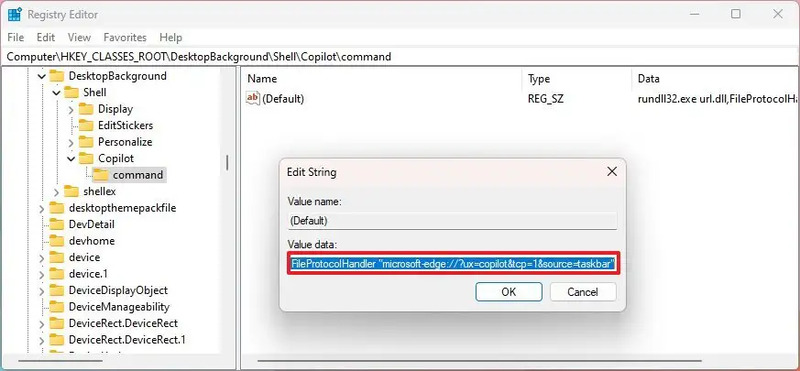
Step 10: Double-click String Value (Default) and set the value to:
rundll32.exe url.dll,FileProtocolHandler “microsoft-edge://?ux=copilot&tcp=1&source=taskbar”
Step 11: Click OK
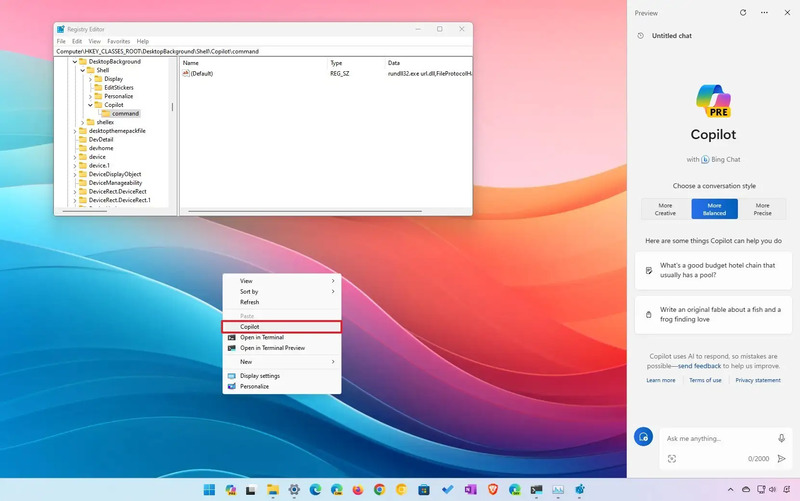
After completing the steps, you can right-click on the desktop and the “Copilot” option will be available from the “Show more options” menu. You can use the keyboard shortcut “Shift + right click” to directly access the context menu.
3. Epilogue
How to add Copilot to the right-click menu is not too difficult, just follow the steps I have instructed in this article. With Copilot, you can save time and effort when working on your computer. Try using Copilot today and feel the difference!

