


1. What is wmvcore.dll missing windows 10?
The error message “wmvcore.dll missing” typically indicates that the wmvcore.dll file, which is a Dynamic Link Library (DLL) file associated with Windows Media Player, is either not present on your system or is corrupted. This issue can prevent certain applications or processes from running correctly, especially those that rely on this DLL file.
2. Cause of wmvcore.dll missing error windows 10?
– Corrupted or Missing DLL File: The most straightforward cause is that the wmvcore.dll file is either corrupted or missing from the system.
– Windows Media Player Issues: Problems with the Windows Media Player installation or its components can lead to the absence or corruption of the wmvcore.dll file.
– Incomplete Windows Update: If a Windows update, especially related to Media Feature Pack, is incomplete or encounters errors, it could result in the wmvcore.dll file being missing or corrupted
– Windows Edition Without Media Feature Pack: Some editions of Windows 10, such as N or KN editions, do not include Windows Media Player and related components by default.
– “Wmvcore.dll Not Found”: “This application failed to start because wmvcore.dll was not found. Re-installing the application may fix this problem.”
“Cannot find [PATH]\wmvcore.dll”/:“The file wmvcore.dll is missing.”
3. How to fix wmvcore.dll missing windows 10?
Step 1: Re-Install Any Programs Causing The Error
The first thing you need to do is re-install any applications that cause the error message to appear on your screen when you attempt to run them. This is because the program in question’s files may have been damaged. To re-install erroneous programs, you first need to remove it by clicking Start > Control Panel > Add/Remove Programs (for XP) or Programs and Features (for Vista and Win7) and select the application from the list which populates. Click the “Remove” or “Uninstall” button and wait for the process to finish up. Once you have removed all the programs you think are linked to this error, restart your PC. Removing the programs that cause the error to show will normally fix the problems you are having.
Step 2: Manually Replace The WMVCore.dll File On Your PC
- Download wmvcore.zip from the Internet
- Unzip the wmvcore.dll file onto your computer’s hard drive
- Browse to c:\Windows\System32
- Locate the current wmvcore.dll on your system
- Rename the current wmvcore.dll to wmvcoreBACKUP.dll
- Copy & paste the new wmvcore.dll into C:\Windows\System32
- Click Start > Run (Or search”run” if you use Vista or Win7)
- Type “cmd” in the box that appears
- Type “regsvr32 wmvcore.dll” on the black screen
Step 3:
Move the DLL from the Windows directory to the affected program’s folder. To do that, use the following path to go to WMVCORE.dll location and copy the file:
C:\Windows\System32
All that’s left is to paste the DLL into the program’s folder. Do that, restart the computer, and the program should launch without throwing an error.
Step 4:
1. Click the start button (windows logo on the taskbar)
2. Click Settings (the gear icon)
3. Click Apps
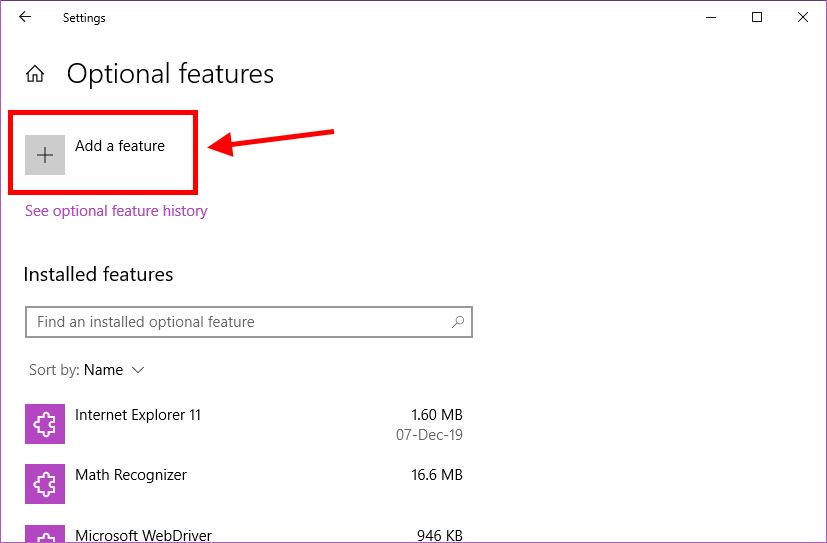
4. Click Optional Features
5. Click Add a feature
6. Search for: Media
7. If Media Feature Pack appears, select it and click Install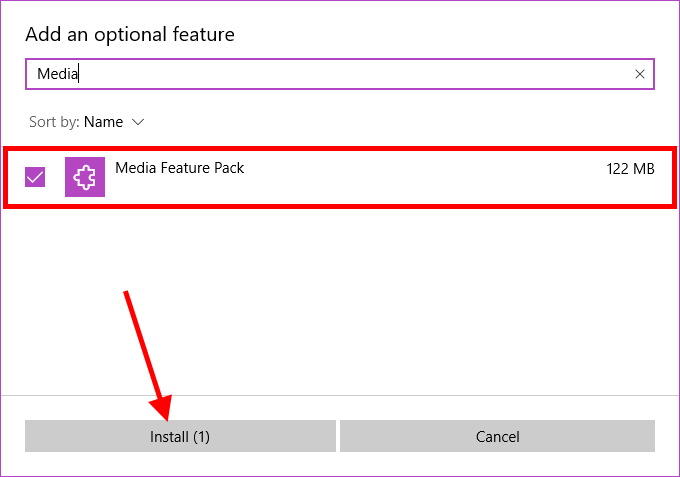
8. Reboot when it tells you to
3. Conclude?
Ok, here dancylove.com has finished guiding you on How to fix wmvcore.dll missing Windows 10. Wishing you success in fixing the error – please comment below if you encounter any problems.